Clicklaw Wikibooks Contributor Guide
This is a help page for contributors or users.
- This page contains no legal help information.
- See other Clicklaw Wikibooks Guides.
This is a guide for contributors with Clicklaw Wikibooks accounts. It contains instructions for the technical aspects of editing and updating content.
This guide is to be used in conjunction with the Clicklaw Wikibooks Style Guide, which aims to help contributors produce consistent and clear language, layout, and formatting. Also see the Clicklaw Wikibooks Cheatsheet for shortcuts for commonly used wiki commands.
Before you edit
Know what you're responsible for
Have you been invited to edit a particular title? Are you certain the page you're about to edit is part of the right wikibook title, and does not belong to a different wikibook?
Be conscientious about which page you are editing. Please only edit pages from those titles (or chapters within titles) for which you are responsible. Let your discretion guide you, or email wikisupport@clicklaw.bc.ca for help.
That said...
Relax, you can't screw up
Having asked you to be mindful of the pages you edit, take comfort in knowing you literally can't damage a page so badly that it cannot be restored.
See Undoing Changes.
The "Edit" screen
Are you at the page you want to edit? Are you logged in? If yes, you can start editing. Please refer to the Clicklaw Wikibooks Style Guide before/while making edits.
- Click on the "Edit" tab or click on the "edit" link beside a particular section (if you only want to edit the text for a certain section of a page).
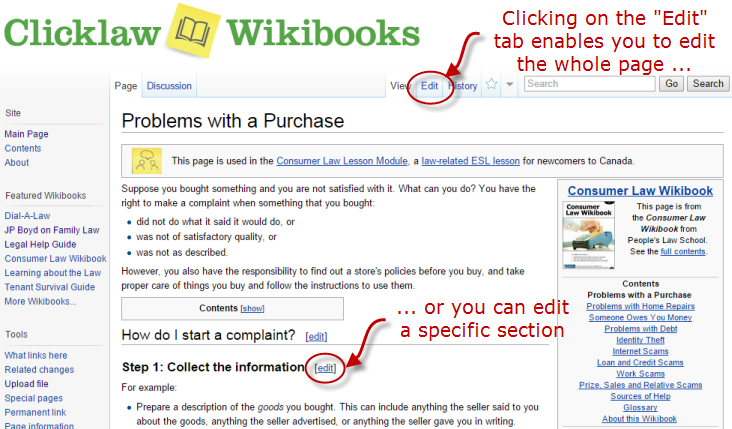
- You can make changes to the text in the edit window, and click on the “Save page” button to save your changes.
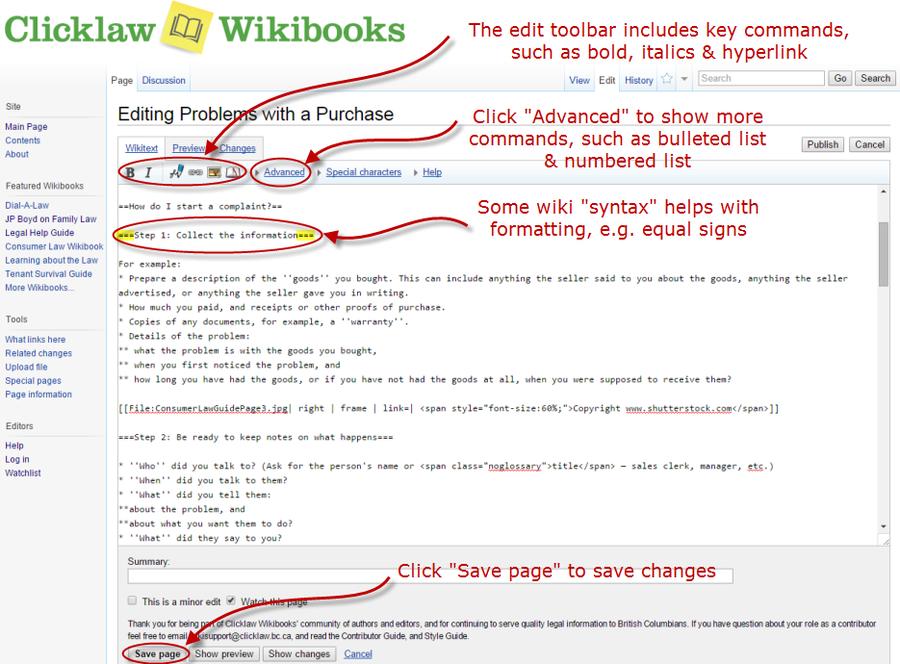
Basic editing tools and formatting
| Tip: See the Clicklaw Wikibooks Cheatsheet for the most basic tips on editing. |
Clicklaw Wikibooks uses a simple markup language to control how content looks, but to start off, you need not know much about this markup language. Buttons along the top of the edit window frame do most of the formatting and wiki markup for you.
Bold
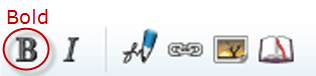
In the edit screen, selecting text then clicking the Bold button will apply the wiki markup to make the text appear bold. Bold text is rarely called for by the Clicklaw Wikibooks Style Guide. Italics are preferred for giving emphasis. However, it is sometimes appropriate to bold the first word in a list item. You can create bold text manually by enclosing one or more words in sets of three apostrophes.
Typing:
I want to make '''this text''' bold.
Will look like this when you save or preview the page:
- I want to make this text bold.
Italics
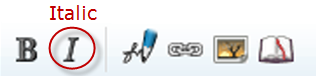
In the edit screen, selecting text then clicking the Italic button will apply the wiki markup to make the text appear in italics. Use Italics sparingly to add emphasis to words that are unfamiliar or to disambiguate ones that the reader might mistake. Italics are also used to cite cases, legislation or certain other sources.
To create italic text manually, enclose one or more words in sets of two apostrophes. Typing:
An ''arquebus'' is an early muzzle-loaded firearm, while an ''aquabus'' is a motorized boat.
Will look like this when you save or preview the page:
- An arquebus is an early muzzle-loaded firearm, while an aquabus is a motorized boat.
Links
Link to another website
Examples of external links include any link to another website, or even a PDF or DOC file somewhere online. Cases on CanLII, for instance, require external links. The simplest way to insert an external link is to just type the full URL, including the http:// prefix.
Typing:
For more information on the Court of Appeal process, visit http://www.courtofappealbc.ca
Will look like this when you save or preview the page:
- For more information on the Court of Appeal process, visit http://www.courtofappealbc.ca.
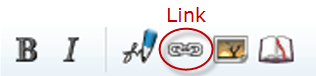
Much of the time, you won't want the link to appear so obvious. To have other words appear with links to online resources, select the text you want to contain the link, then click the Link button. You will be prompted to enter the URL (the link to the online resource). Select "To an external web page", then click "Insert link".
Typing:
For more information, visit the Court of Appeal BC's [http://www.courtofappealbc.ca Online Help Guide].
Will look like this when you save or preview the page:
- For more information, visit the Court of Appeal BC's Online Help Guide.
Link to another wiki page
One page in a wiki often naturally leads to another page on the same wiki. Here is a link to the Clicklaw Wikibooks Style Guide, which is a Clicklaw Wikibooks page. To make an internal link, click the Link button. You will be prompted to enter the target page, which must be the exact name of the page, and the text to display for the link. Select "To a wiki page" at the bottom, then click "Insert link".
Typing:
Editors are encouraged to read the [[Clicklaw Wikibooks Style Guide | Style Guide]].
Will look like this when you save or preview the page:
- Editors are encouraged to read the Style Guide.
Note: twin square brackets are used for internal links.
Link to a location on the same wiki page
Sometimes, you may need to refer to a section within the same page.
Typing:
To learn how to insert links, read [[{{PAGENAME}}#Links | Links]].
Will look like this when you save or preview the page:
- To learn how to insert links, read Links.
Link to a location on another wiki page
Sometimes a reader only needs to see a small section of a larger wiki page. When that section is in the middle of a long page it can be hard for the reader to find. Alternately, you can save the reader from scrolling by building a targeted link to that relevant section.
Typing:
To learn how to name a wiki page, read about [[Clicklaw Wikibooks Style Guide#Page titles | page naming convention]].
Will look like this when you save or preview the page:
- To learn how to name a wiki page, read about page naming convention.
Example of a court decision citation and link in proper wiki format
Typing:
''[http://canlii.ca/t/2d35m Domirti v. Domirti]'', 2010 BCCA 472
Will cause this nice mix of italics and working links according to the Style Guide:
- Domirti v. Domirti, 2010 BCCA 472
A case with no link available would be typed:
''Mareva Compania Naviera S.A. v. International Bulkcarriers S.A.'', [1980] 1 All E.R. 213
It would look like this:
- Mareva Compania Naviera S.A. v. International Bulkcarriers S.A., [1980] 1 All E.R. 213
Headings and subheadings
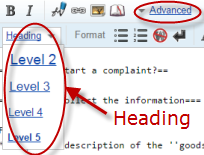
Clicklaw Wikibook pages rely heavily on in page headings and subheadings to break up content and to improve navigation. Select what you want to become a heading, then select the Heading level from the Advanced menu. The results, when saved, will give you a primary section heading in the text of an article.
Headings within a page can also be produced by typing multiple equal signs, and you are not restricted to a single, primary level of header. A primary section heading is achieved by typing:
==Words in primary heading==
A subsection below a primary heading is achieved by typing:
===Words in secondary heading===
A maximum of five heading levels is possible. Just keep adding more equal sign symbols. Spaces between the equal signs and the heading text are optional, and will not affect the way the heading is displayed. The heading must be typed on a separate line. Include one blank line above the heading, and optionally one blank line below it, for readability in the edit screen. (Only two or more consecutive paragraph breaks will add white space between paragraphs of text in the page once saved.)
These points apply to in-page headings:
- Use sentence case for section headings — that is, the initial letter of a title is capitalized; otherwise, capital letters are used only where they would be used in a normal sentence.
- Headings should not normally contain links, especially where only part of a heading is linked.
- Section and subsection headings should preferably be unique within a page; otherwise section links may lead to the wrong place.
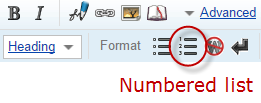
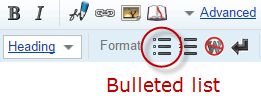
Lists
The Clicklaw Wikibooks Style Guide calls for using bulleted lists to break up serial information where the order is not important, and numbered lists where steps or some other sequence is important to understand the information.
The edit toolbar has the buttons for making lists in the Advanced menu. They are also simple to create as you type. Authorities on plain language writing agree that lists make information easier to absorb.
Making a list
Once you are logged in, and are in the Edit screen of the page you want to change:
- Numbered list: Place each list item on its own line, and start each line with a pound symbol "#". Click "Show preview" to see the list. Notice that the numbered list automatically ends at the last line you started with a pound symbol. Alternatively, you can select the lines and click the Numbered List button.
- Bulleted list: To make a list with bullets, follow the same steps as for a numbered list, but replace the pound symbol with an asterisk. You can also use the Bulleted List button.
List examples
| Description | This wiki code | Results in this display on the page |
|---|---|---|
| Numbered list | # One # Two |
|
| Bulleted list | * Red * Green |
|
More complicated lists with sublists are achieved by adding an extra pound or asterix symbol beside items you want to appear as indented subordinate list. Lists can include a mix of bullets and numbers at different levels.
| Description | This wiki code | Results in this display on the page |
|---|---|---|
| A numbered list with a subordinate list that is also numbered. | # Item one # Leads to item two: |
|
| A mixed list. Numbered list with a subordinate bulleted list. | # Item one # Leads to item two: |
|
| A bulleted list with a subordinate list of numbers, and a further subordinate list of bullets. |
* This point is simple. * This point is complicated, and includes: |
|
Images and video
Uploading images
To upload an image that you will use in a wikibook, or a contributor profile, select the "Upload file" link from the sidebar navigation menu. It is located under the "Toolbox" header. Please use a descriptive name.
Please restrict your photos to .png or .jpg formats.
Embedding images
There are several ways to embed an image — however only a couple work well and support PDF, EPUB, and print-on-demand viewing. Consistency is important, so please use this approach:
| Writing this: | ... should produce this: |
|
 Copyright Information |
Obviously, "DescriptiveImageName.jpg" should be replaced with the name of the image you uploaded.
The copyright information may take the form of "Copyright www.shutterstock.com", for example.
Videos
Clicklaw Wikibooks supports videos embedded from Youtube. You will need to be working with videos you have already uploaded to Youtube directly. You cannot upload videos to Clicklaw Wikibooks directly.
You have two options:
- left aligned videos
- right aligned videos
These script might look complicated, but you will only be changing one thing: the unique identifier, e.g. ivsBIwncoiY. This is the unique alphanumeric string found at the end of a Youtube video's "Share" link.
To embed a video (left aligned) type:
{{Video || video = {{#ev:youtube|ivsBIwncoiY|350|right}} }}- Remember to replace "ivsBIwncoiY" with your own video's unique identifier.
This code should embed a left aligned video:
To embed a video (right aligned) type:
{{Videoright || video = {{#ev:youtube|ivsBIwncoiY|350|right}} }}- Again, remember to replace "ivsBIwncoiY" with your own video's unique identifier.
This code should embed a right aligned video:
Legal accuracy date
Most pages advertise the last date of legal review. This is important for readers who want current legal information. The notice sits at the bottom of the page and looks like this:
| This information applies to British Columbia, Canada. Last reviewed for legal accuracy by Audrey Jun, September 2016. |
There are two instances when the legal accuracy date notice on a page should be updated:
- the page has been reviewed in its entirety for legal accuracy and no change is required
- the page has been reviewed in its entirety for legal accuracy, changes were required, and all changes have been made
Contributors can change the legal accuracy date by:
- logging in
- going to the relevant page
- selecting Edit mode
- changing the month and year in this line:
{{REVIEWED | reviewer = [[Audrey Jun]], September 2016}}
- clicking "Save page"
Undoing changes
One of the best things about this wiki platform is that each page has a "History" of older versions, including the one you just saved over. You (or another person) can always undo an edit and restore the older version.
When viewing a page's history tab:
- Selecting Undo on the current version will show you the difference between it and the next most recent version, and you can then select "Save page" to restore the earlier of the two versions.
- Selecting Rollback is usually overkill. This undoes all recent changes by that contributor back to the last version saved by another user other than that contributor. Do not use this option unless you are sure.
Watchlists and user feedback
As an editor, certain pages (or whole titles) are assigned to you. Visitors can leave feedback on your pages, which can sometimes serve useful information on how to improve the content. Starting in 2020, visitors leaving feedback on your pages will trigger an email alert so you can see what they've said. The email will include a link for you to log in and check off the feedback as resolved.
See Notifications to Contributors if Users Leave Feedback for more instructions.
Advanced features
Disabling Glossary/Terminology Popups
Terms that appear along with their definitions on the Terminology page will automatically be detected the first time they appear on any article in the Clicklaw Wiki. In general, this saves work, since no manual coding is required to ensure that a legal term will include a definition. The automatic nature of this process, however, will result in false-positives in cases where a defined term also has a common meaning in addition to a legal one (the terms "hearing", and "order" for example).
Disabling a single occurrence of a term
To exclude defined terms from appearing with their pop-up definition (and where it is the first time the term has been used on a page), you should bracket the term with the HTML element:
<span class="noglossary">term</span>
A <div> tag will also work but create a separate paragraph that may not be desired.
Disabling definitions for a whole page
To exclude an entire article from receiving glossary popups you need to place one line of text on the page. From the edit screen include the text:
__NOGLOSSARY__
It is common to place this at the end of the text of a page.
| |||||||||||||||||||||||||||||||||||