Adding a new service: Difference between revisions
Jump to navigation
Jump to search
Desy Wahyuni (talk | contribs) mNo edit summary |
Desy Wahyuni (talk | contribs) No edit summary |
||
| Line 1: | Line 1: | ||
Through the Clicklaw contributor site, you can '''add a service''' that is offered by your organization. | Through the Clicklaw contributor site, you can '''add a service''' that is offered by your organization. | ||
{{Tipsbox for Clicklaw Wiki | |||
| width = 80% | |||
| tips = Before you begin to add a new service, take a few moments to collect some information about it – this will save you time! | |||
See [http://clicklaw.bc.ca/content/guidelines Clicklaw Content Criteria and Guidelines] to determine if a service is suitable for adding to Clicklaw. | |||
}} | |||
# Log in as a Clicklaw contributor. | # Log in as a Clicklaw contributor. | ||
Revision as of 07:30, 20 October 2011
Through the Clicklaw contributor site, you can add a service that is offered by your organization.
Template:Tipsbox for Clicklaw Wiki
- Log in as a Clicklaw contributor.
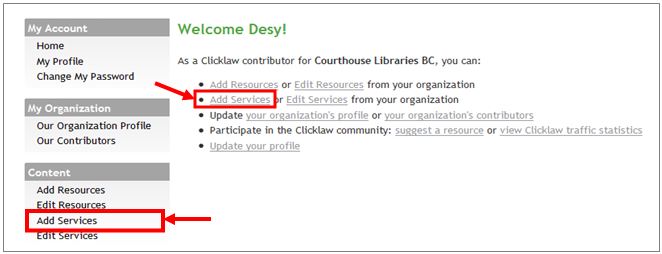
- Click “Add services” on the contributor homepage or in the left menu bar of the contributor site. This brings up the “Add a resource” form.

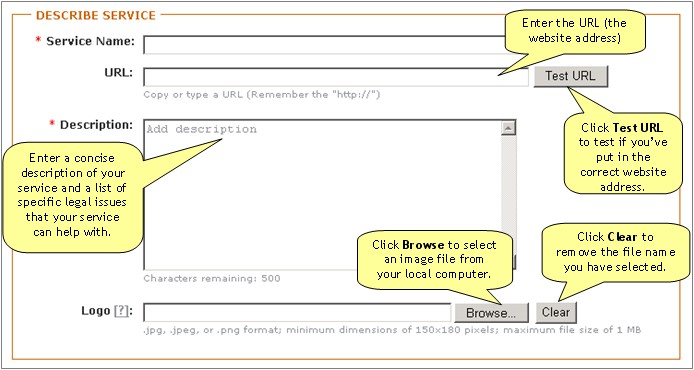
- Describe your service by entering the service name, URL (the website address), and some other details.

Requirements for the logo file:- The image must be in PNG or JPEG format.
- The file size of the image must not exceed the maximum file size of 1 MB.
- The dimensions of the image must be no smaller than 150x180 pixels.
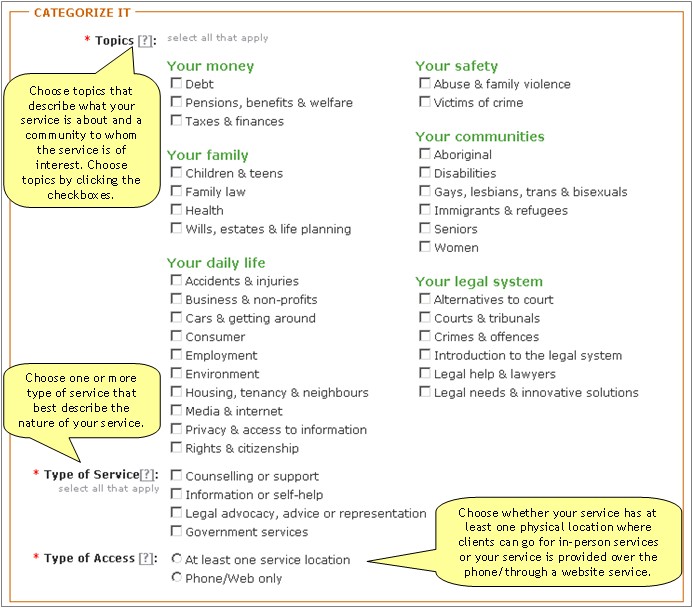
- Categorize your service based on categories from the Clicklaw taxonomy and how people can access it.

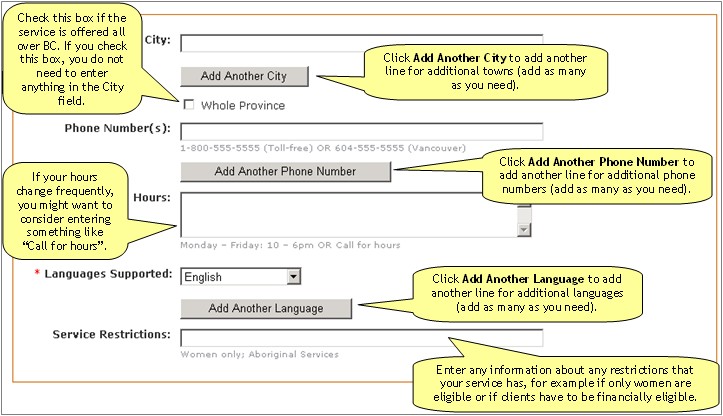
- If your service has one or more physical location(s) where clients can go for in-person services, enter the location details.
File:Adding new service 3b.jpg - If your service is provided over the phone or through a website only, enter the information on how to access it.

- If your service has one or more physical location(s) where clients can go for in-person services, enter the location details.
- Once you have completed the form, you can Publish your service or Save as Draft.
